Tuesday, April 19, 2011

Vanilla Bean Bundt Cake with Vanilla Bean Glaze

This wonderful recipe came from Sweetapolita's blog.  You can find her blog
HEREIf you have never stumbled upon it before, you should check it out.
She posts the most wonderful recipes.  This isn't the first I've made from her blog and
it won't be the last!
It is the first time I have ever used real vanilla beans.
What a neat experience too!  Felt so good to use something all natural.
Real vanilla beans are pretty expensive.  Especially if you use a good
quality bean.  But the flavor is unmistakeable!
I find using vanilla flavoring in liquid form can be over-powering in a
recipe.  Not so with the delicate vanilla bean!  Perfection!

You simply split the vanilla bean with a sharp knife and use the tip of
the knife to scrape out the black grit (which is the vanilla bean).  So simple!
I feel silly now avoiding using recipes with real vanilla bean :)

This cake was gobbled up by family and co-workers alike.  They went on and on
about how the cake wasn't too sweet.  Again, perfection!
I did, however, mess up on her instructions for the glaze.
I made the vanilla milk as she instructed and then added my powdered sugar
to it.  Needless to say, I did this backwards.  My glaze? Too runny.
I added more and more powdered sugar, but it was still too runny.
Next time, I'll make the vanilla milk and then add it to my powdered sugar! Duh!!

You can find Sweetapolita's recipe HERE


Tuesday, April 12, 2011

For Pete's Sake Pottery - a thank you!


About a month and a half ago, I was lucky enough to win a giveaway
from Bird @ Bird's Party blog HERE.  What did I win?
$50 worth of pottery from For Pete's Sake Pottery!! Heck ya!!

Susan Brown, owner of this wonderful hand-painted gift store,
has quite a talent for making beautiful pottery items.  Her painting skills are
extraordinary!  One we exchanged info back and forth, Susan allowed me
to pick from her many different pottery pieces, like these:

Cute glass pitcher

Awesome ceramic tray - how handy would this be?


Caaa-uuutee wreath, personalized!


Bunny plate - just in time for easter!


Bowl (for your jelly beans...they never last that long in our house!)

Everything she has is so cute!  It was hard to decide.  But I finally picked something!
I've been needing a dessert plate for a long time.  Something cute and great
to use to display sweets for my blog.  Susan was so easy to work with!
She let me pick my own colors and design and she made some awesome
color suggestions!

So... here it is...my new dessert plate, handmade by Susan!


I love it!!  She did an awesome job on it!  It is even better than
I imagined, if that is possible!  Thanks, Susan!
She also sent along the cutest little chick magnet for my
fridge and this little cutie: 

How cute, right?!!  It's over the top cute!
I thought I'd christen the dessert plate with some Supreme Bars! Mmm!


Hope you'll check out Susan's site on Etsy (web address above).
She's also on Facebook for those of you that use that!

Susan, I couldn't be happier with my goodies!  Thank you so much!

Friday, April 8, 2011

Scones...oh so delightful!


Scones are a wonderful quick bread style pastry (if you can call them that)
that is just plain delicious and tender with any fruit in them.
This weekend I treated my family to Blueberry Scones for
breakfast.  They were gobbled up fast!

Here is the recipe, compliments of recipes.com.

Blueberry Scones

2 cups all-purpose flour
1/4 cup packed brown sugar
1 T baking powder
1/4 tsp salt
1/4 cup cold butter (chopped)
1 cup fresh blueberries (or any fresh fruit)
3/4 cup half and half (I used 2% milk and it worked just fine)
1 egg

Directions:

Preheat oven to 375 degrees.  Cut butter into mixture of flour, sugar, baking powder, and salt.  Add blueberries and toss to mix.  In a separate bowl beat together cream (or milk) and egg, slowly pouring into dry ingredients, stirring gently with a rubber spatula until a dough, of sorts, forms.  Knead until it comes together but do NOT overwork.  Okay folks..I will warn you, this is a wet and sticky dough.  Don't be tempted to add more flour...not yet.  Divide the wet sticky mess in half and dump onto a very floured countertop.  Knead with hands covered in flour.  Prepare to make a mess! LOL  Mix as well as you can.  Pat out each half into a circle and cut into 6 wedges.  You will have a total of 12 wedges when you are finished.  Bake on an ungreased sheet about 20 minutes.  Best served warm, with butter, but delicious later after it cools too!  Enjoy!


Tuesday, April 5, 2011

Easter Decorations (on the cheap)

Not sure about you, but I just realized Easter is sneaking up on us fast!  This weekend I dragged out my Easter decoration tote and proceeded to decorate.  I realized, rather quickly, that I have a limited amount of decorations for this holiday.

I wanted a couple of nice table centerpieces but didn't want to spend a lot of money. Dollar Tree is great when you are faced with this predictament!  I was able to make 2 centerpieces for about $12.  I was able to make 2 because I already had a big candle vase that only needed filling.  I bought 1 vase from Dollar Tree.  Here's my creations:


This one uses a vase, 3 bags of gourmet jelly beans, 2 faux spring flower bunches,
and a roll of tule.  All of this came from the Dollar Tree for $1 each!! Total:  $7  This one, by far, is my favorite!!  And later?  We can eat the jelly beans!!!


This one cost a mere $5.  I already had the candle vase, plastic eggs, little bunny pick, and left-over tulle from the first arrangement.  I only needed 4 faux flower springs and some easter grass.

Have you made anything cute for Easter (on the cheap) lately?  If so... do share!
I have some areas in the house that need more decorations!!

I'm linking up with Stephanie's linky party  HERE!  Hope you will too!

UndertheTableandDreaming


Friday, April 1, 2011

Heavenly Chocolate Cheesecake


It's no secret... I love me a good cheesecake!
I laugh and tell folks that there MUST be a special place in Heaven where
all they serve is cheesecake! mmmm...

This weekend I had the privilege of trying out a brand new recipe for
chocolate cheesecake.   I've never made a chocolate cheesecake!  I know...crazy! LOL
This recipe was simple but not for the faint of heart.
It took 2 1/2 whole whoppin' pounds of cheesecake to make it.
But man...oh man...is it good!

I'd like to thank LPC Interiors blog for her posting of this extra delicious recipe!
You can check out her blog HERE.  I omitted her lemon zest.  I am not a lemon
fan at all, especially in cheesecake.  But if you are, feel free to add 1 T of it
in the filling part! :)

Chocolate Cheesecake

Crust:

1 1/2 cups graham cracker crumbs
1 T sugar
6 T butter (melted)

Filling:

5 8 oz packages cream cheese - at room temperature
1 1/2 cups sugar
5 whole Extra Large eggs - at room temperature
2 egg yolks from 2 Extra Large eggs - at room temperature
1/4 cup sour cream
1 1/2 tsp vanilla extract
8 oz chocolate chips - melted (I bought a 12 oz bag and used the extra for the drizzle!)

Preheat oven to 350 degrees.

Crust:  crush graham crackers in a gallon size ziplock bag with a rolling pin.  Add sugar and melted - but cooled butter to the bag and rub back and forth to mix with your hands.  This keeps from making a big mess and dirtying up a bowl!  Pour into a 9" springform pan.  With your hands or the back of a metal spoon, press crumbs into the bottom of the pan and about 1" up the sides.  Bake for 8 minutes.  Cool to room temp.

Raise oven temp. to 450 degrees.  For the filling, cream cream cheese and sugar in a bowl with an electric mixer on medium high until light and fluffy.  Reduce speed to medium and add eggs and egg yolks, one at a time, mixing well.  Scrape down the bowl and beater, as necessary.  With the mixer on low, add sour cream, vanilla, and melted chocolate.  Mix thoroughly and pour into cooled crust.

Bake for 15 minutes.  Turn oven temperature down to 225 degrees and bake for another 1 hour and 15 minutes.  Turn oven off and open the door wide.  The cake will not be completely set in the center.  Allow the cake to sit in the oven with the door open for 30 minutes.  Take the cake out of the oven and allow to sit at room temperature for 2-3 hours until completely cooled.  Wrap and refrigerate overnight.  Enjoy!

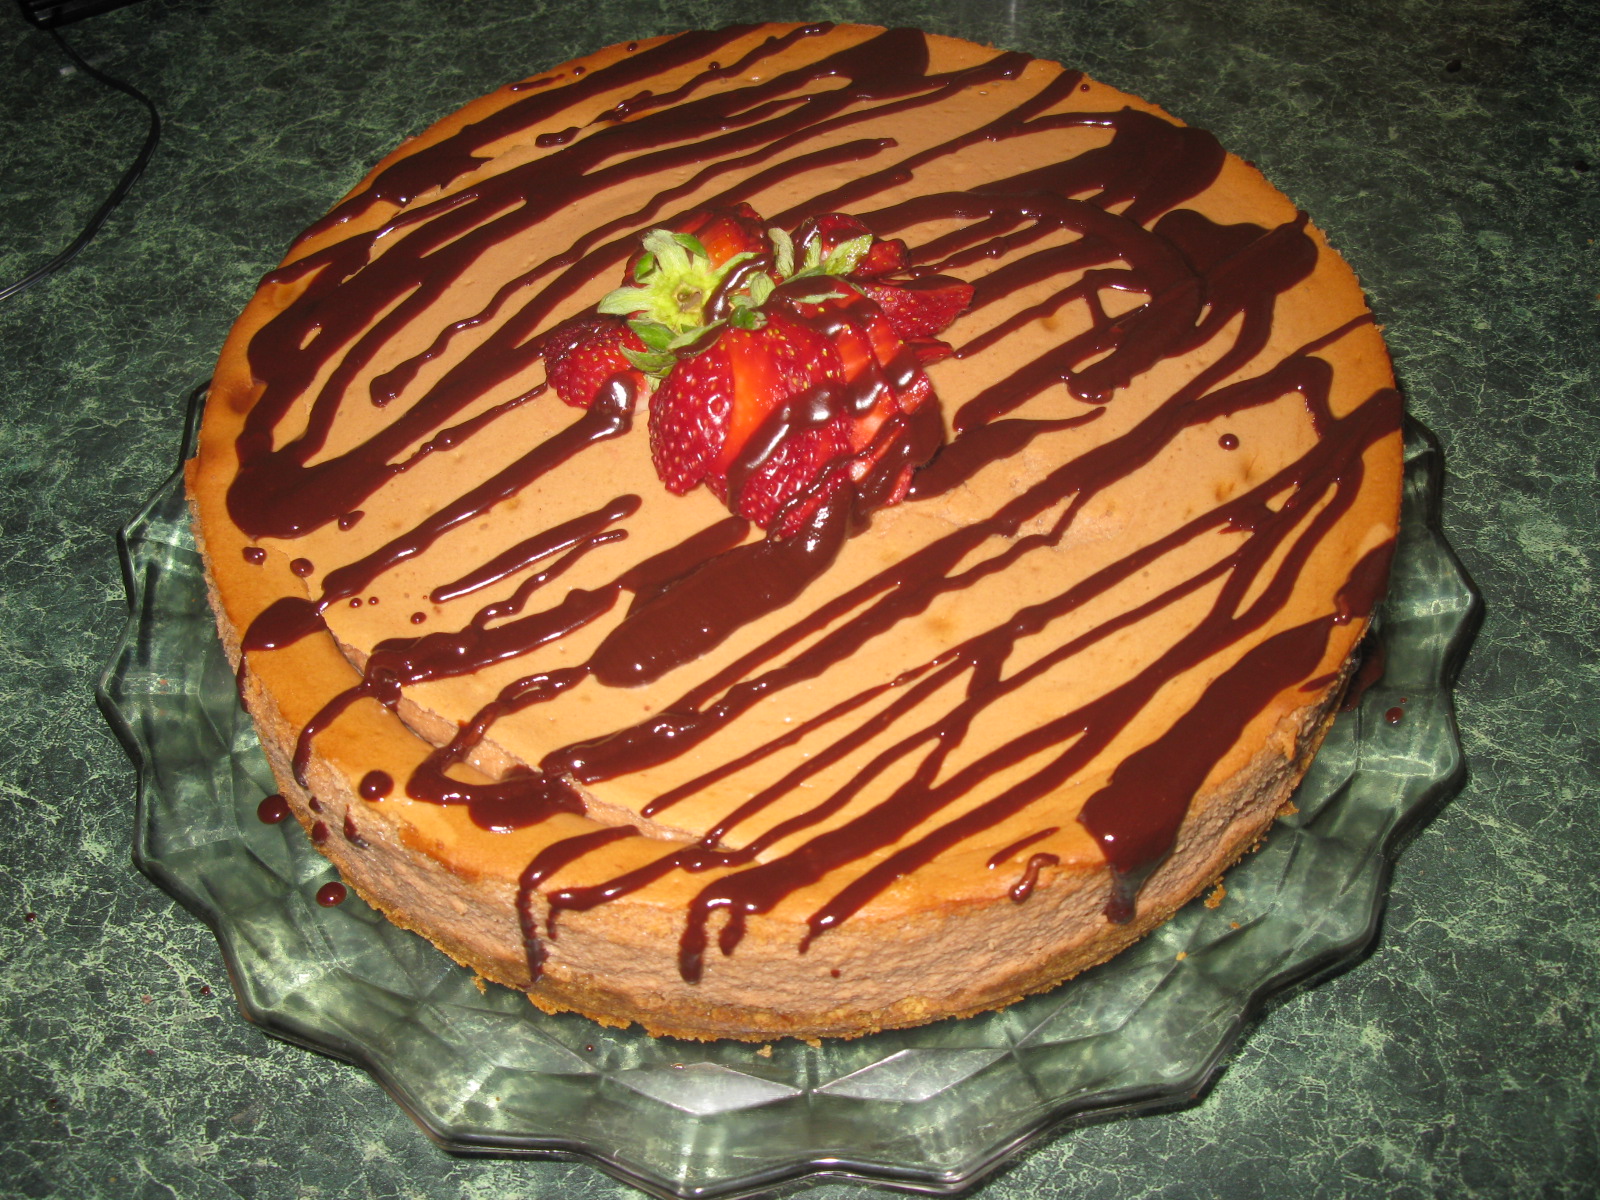
This cheesecake recipe did not disappoint.  My husband and co-workers agreed it was the best chocolate cheesecake they had ever ate!  If you don't like chocolate, leave that part out and use all the other ingredients.

I added a simple chocolate glaze by mixing the remaining chocolate chips (melted) and about 2 tsp of butter melted together on the stove.  I poured this into a glazing bottle and drizzled over the cake after adding some cut strawberries to the center.